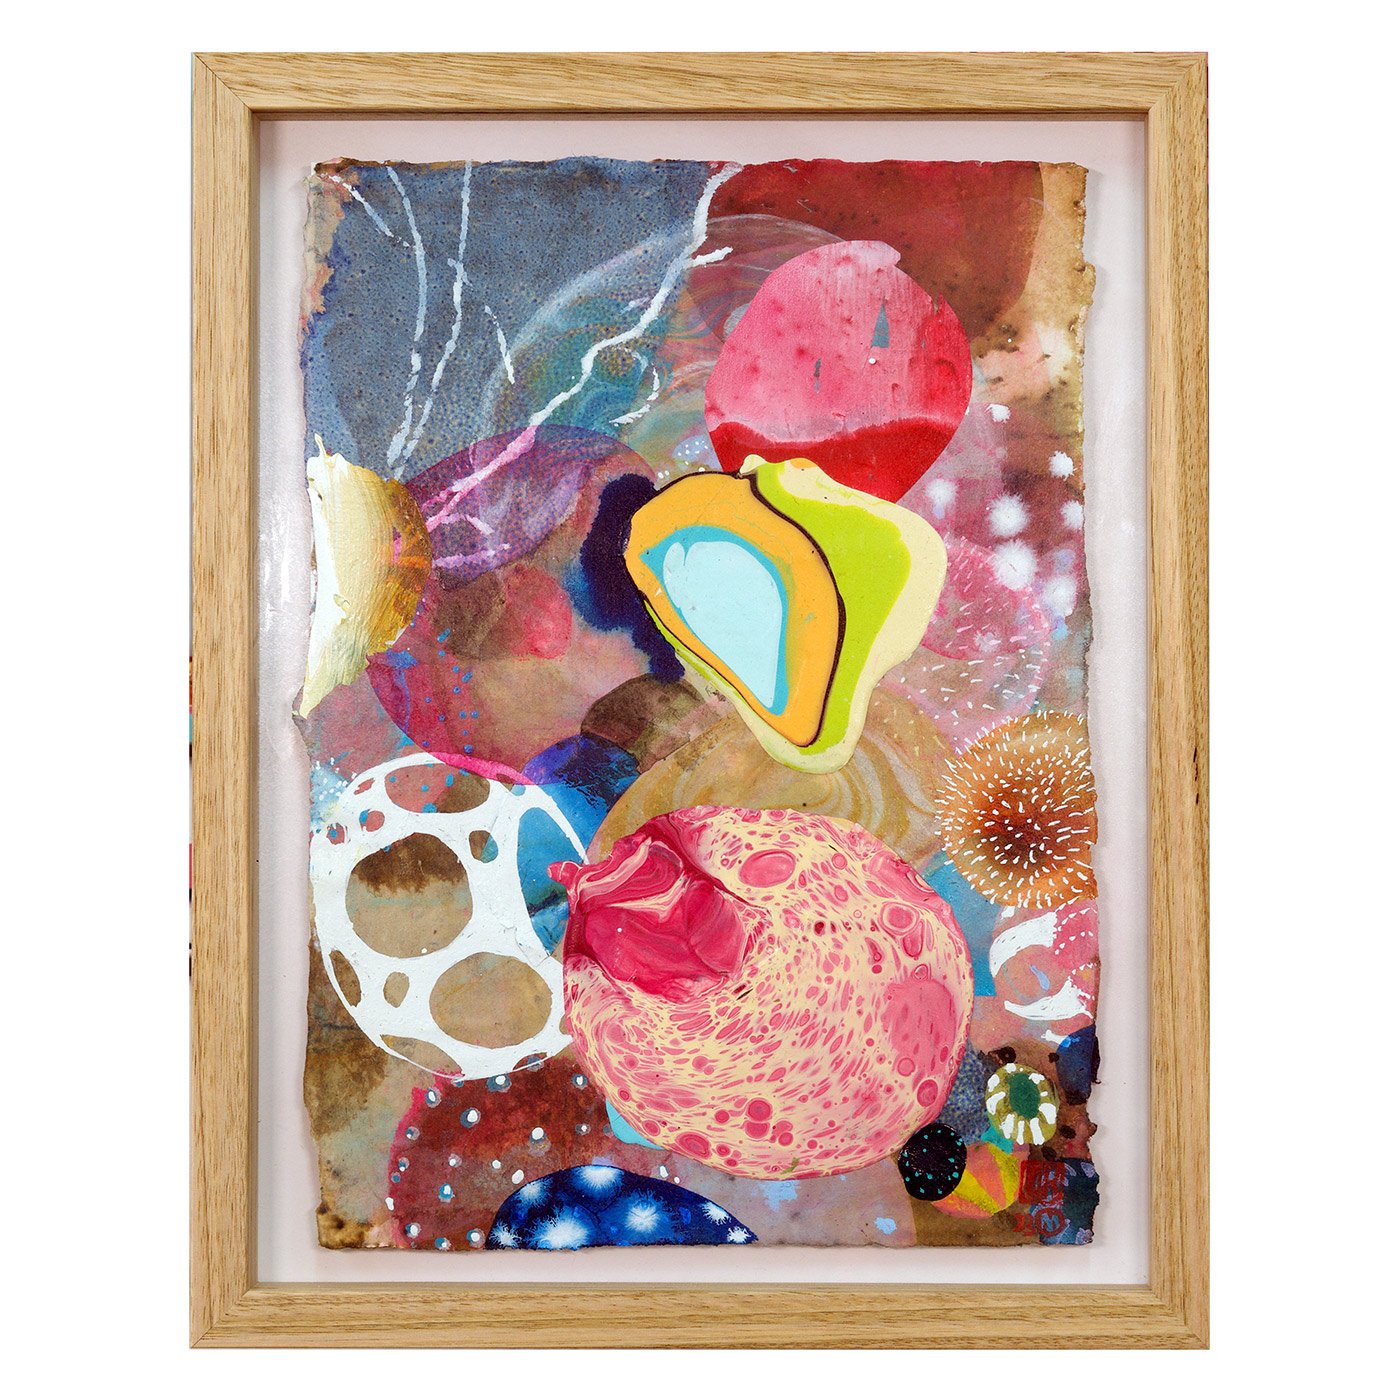
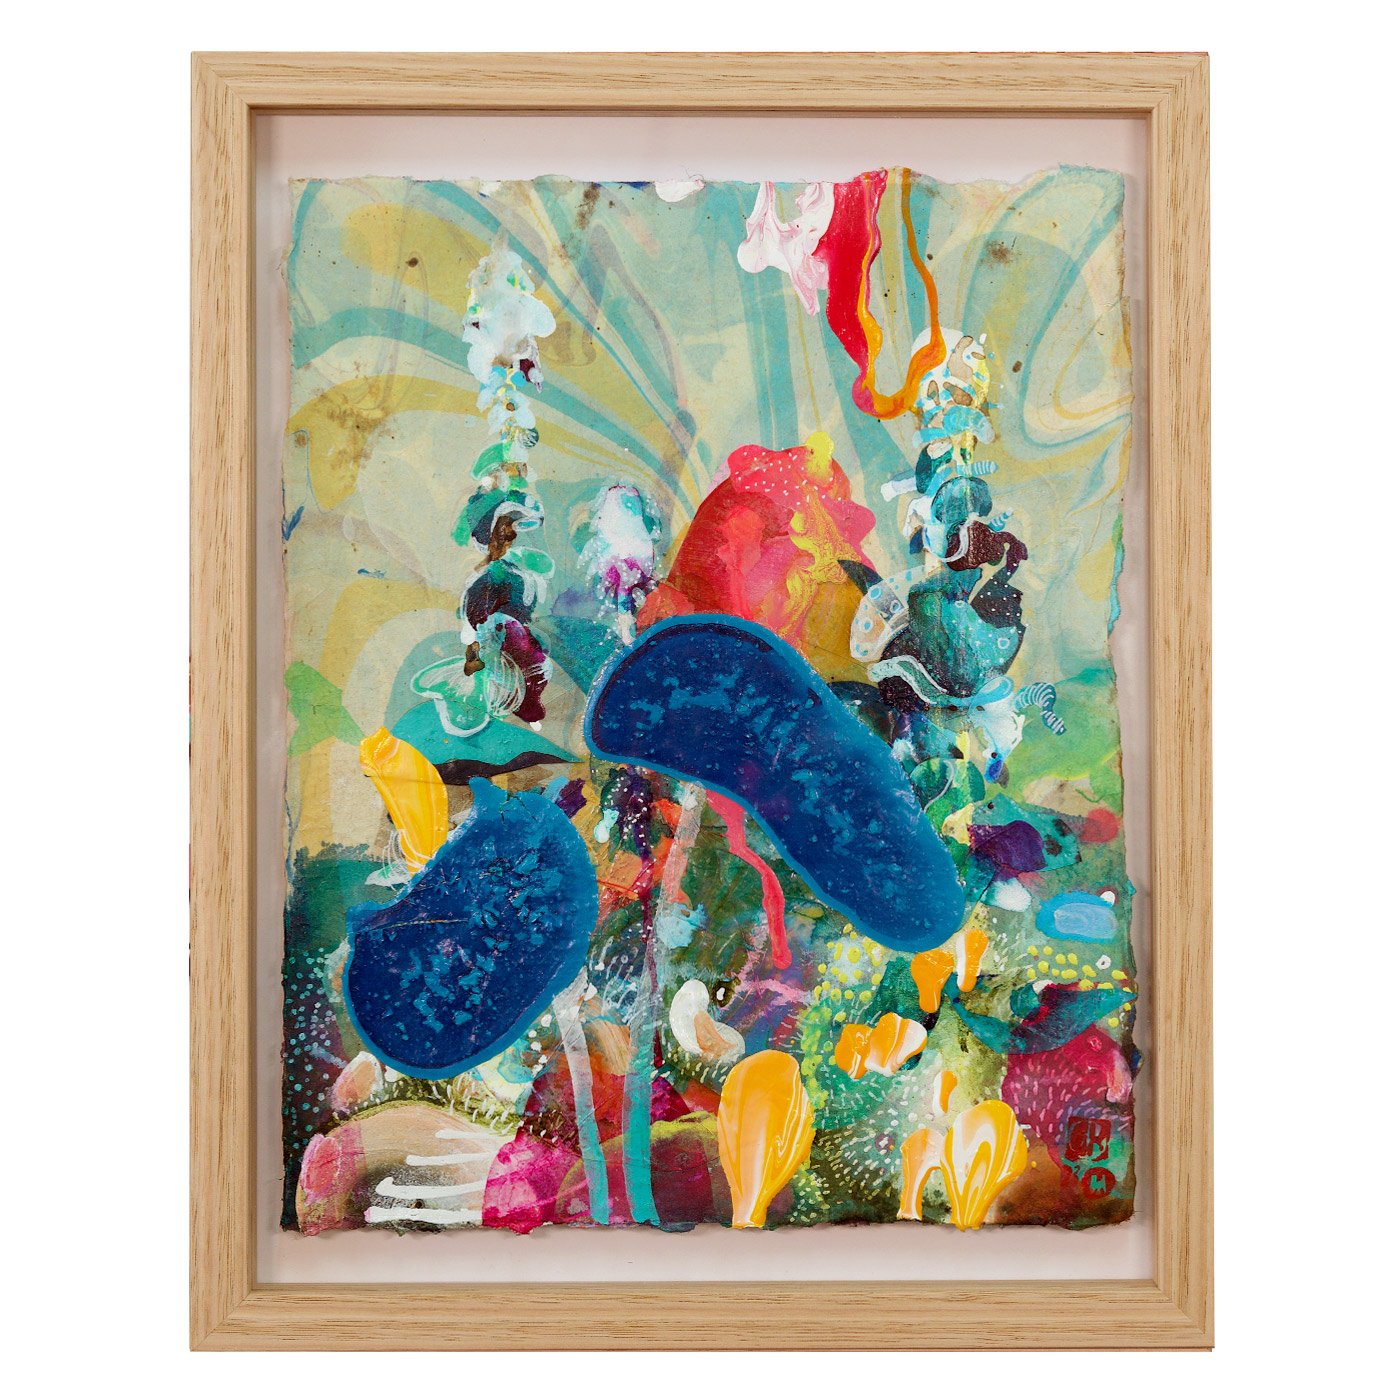
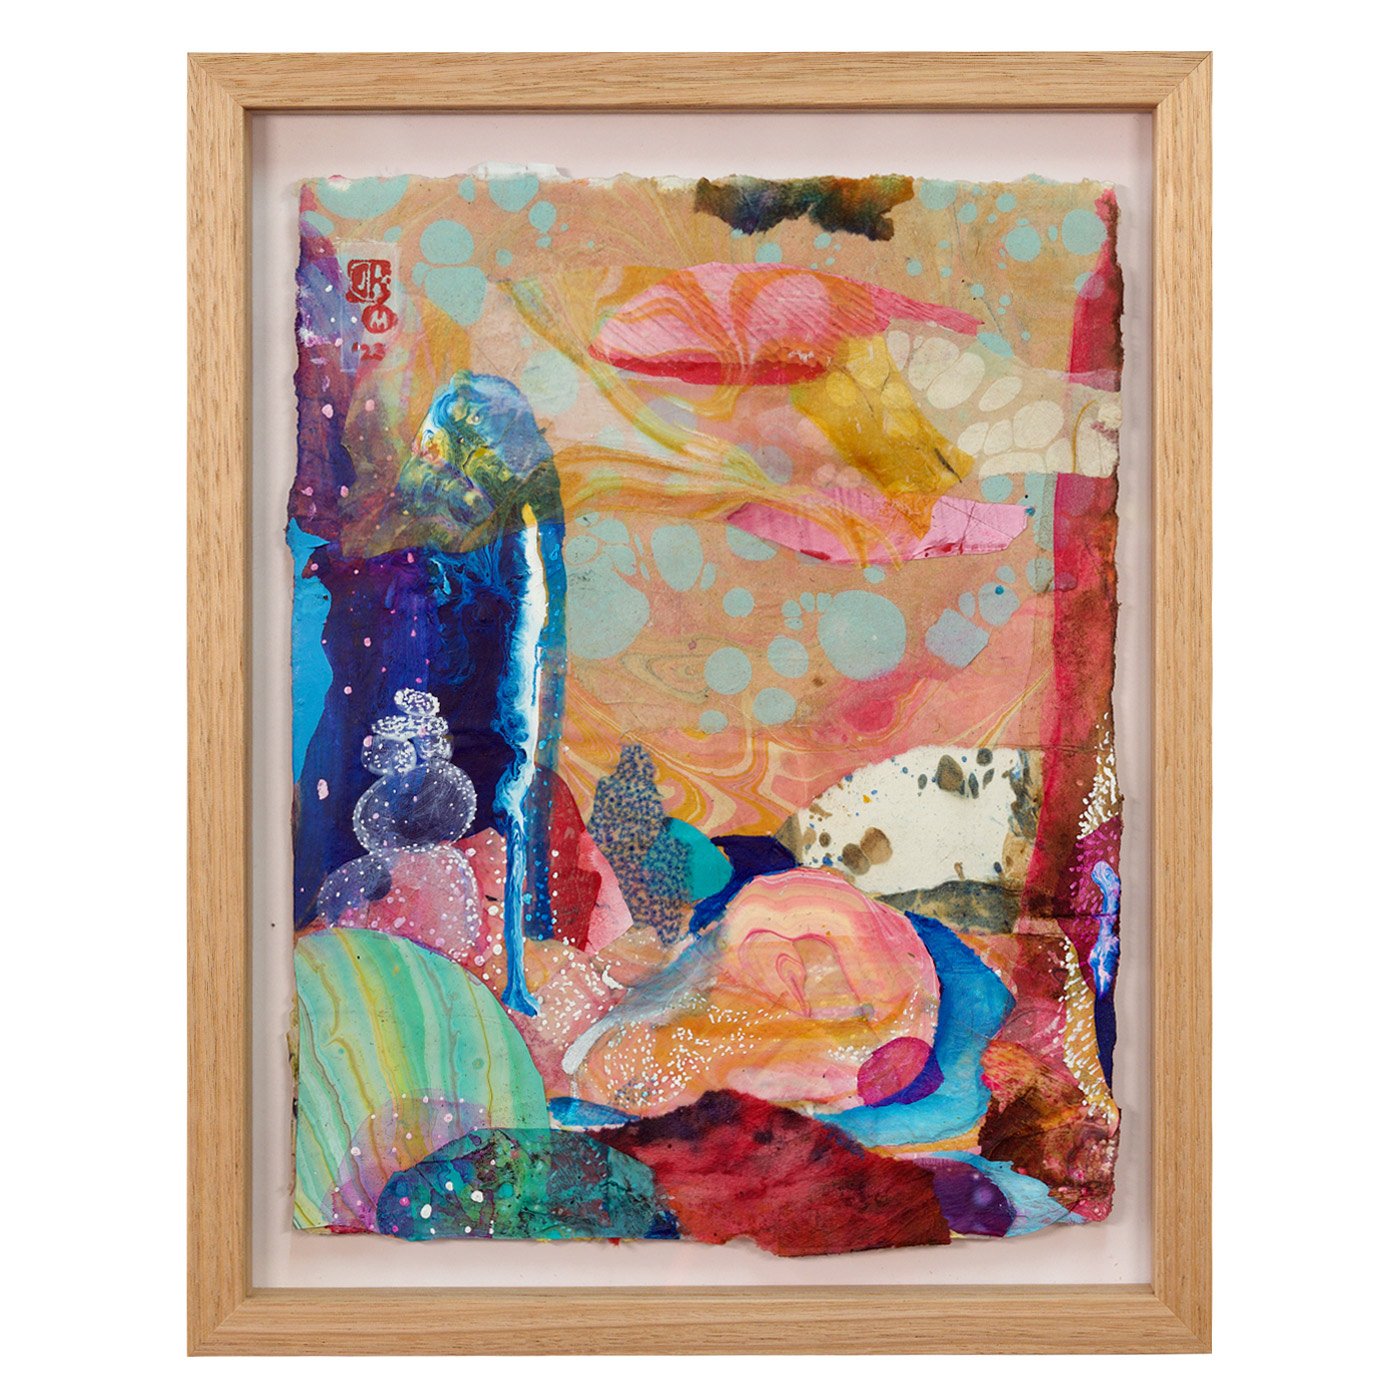
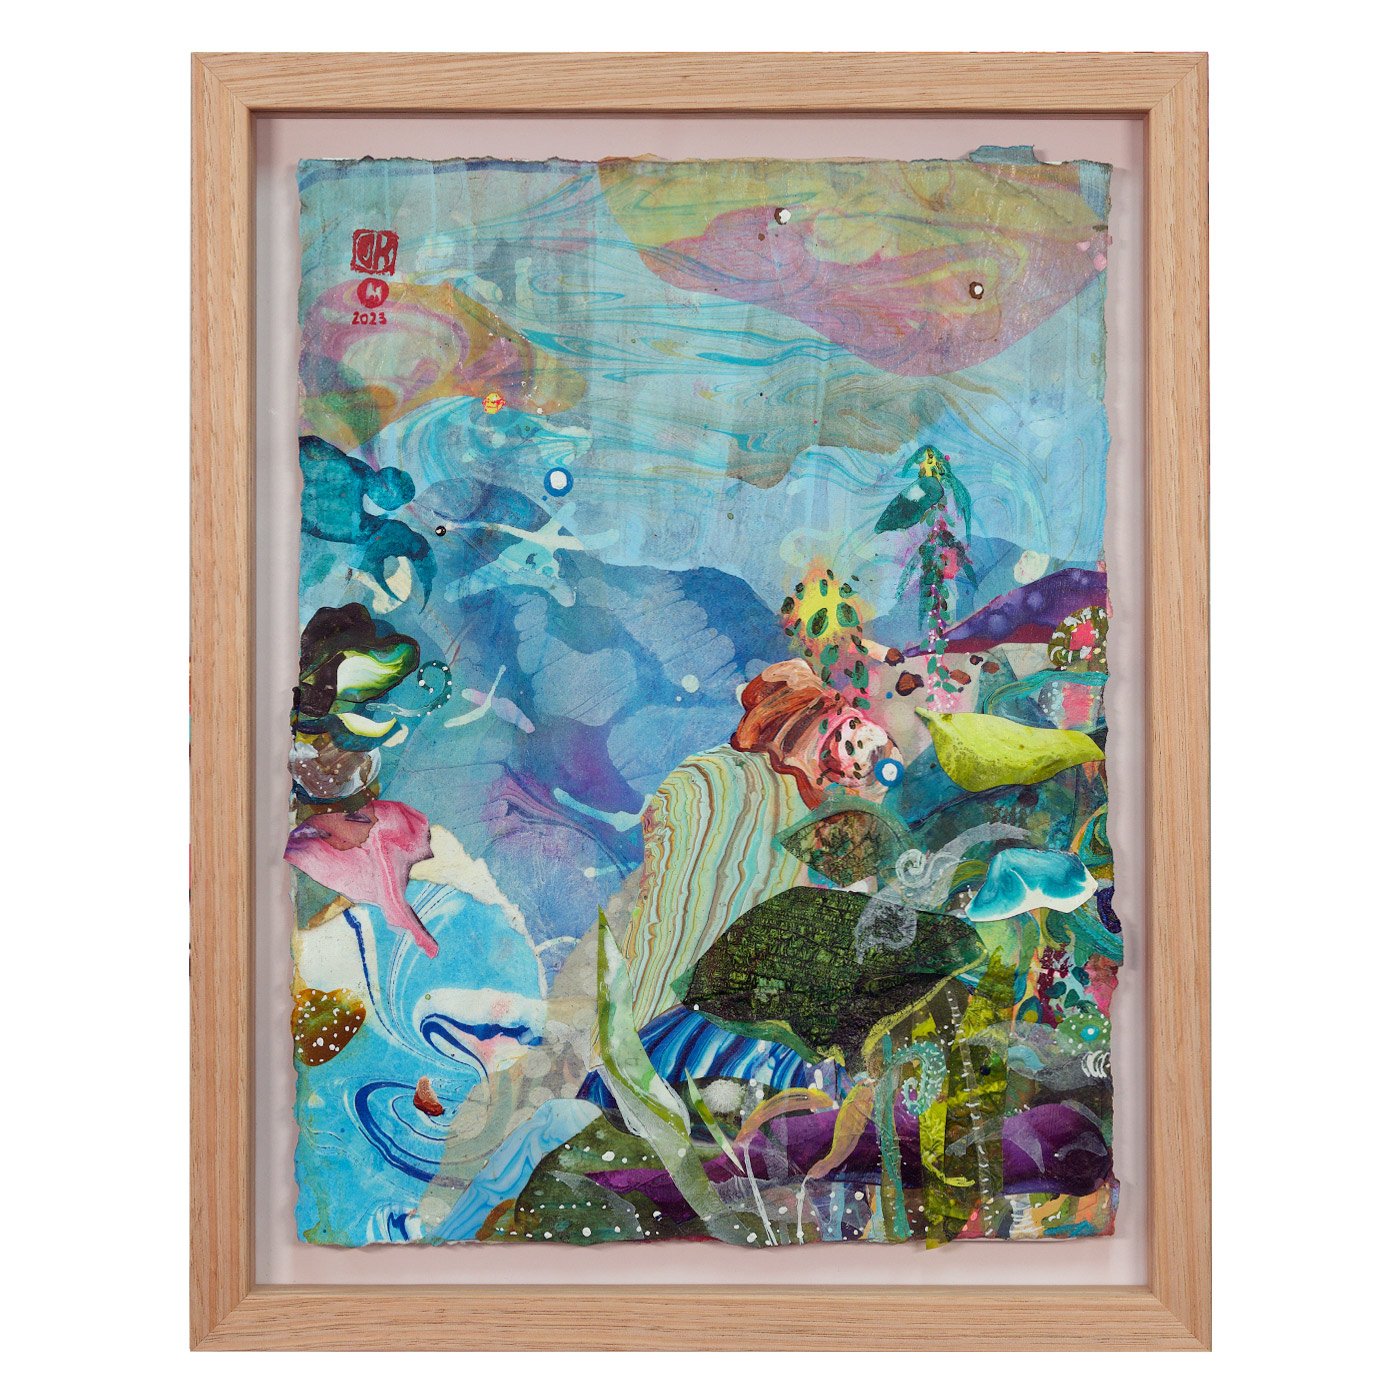
For much of the last month in the studio I’ve been experimenting again with paper as my painting substrate. In the past I’ve found this to be a freeing exercise, without the pressure of results-based art making. It opens up possibility for discovery and innovation (well that’s the hope, but no pressure, right?)
Around 15 years ago, I attended a series of camping workshops on Moreton Island (in Queensland, Australia) with teacher Stephen Newton (@newtonsculpture on instagram). This was held through the Brisbane Institute of Art. I’m unsure if these Moreton trips are still happening, but if you get the chance to take a workshop with Stephen, I’d grab it with both hands. Although a sculptor by profession, he has a deep and eclectic grasp of materials which is evident even in his paper works. On these trips we worked with condes crystals, and paper marbling (with tar! Yes, the black sticky stuff on roads and roofs). I was a professional painter at the time, but I was working mostly in oils (on canvas), and had yet to explore the versatility of acrylics. I didn’t believe in their value compared to oil paints. I don’t mean to give Stephen too much credit (winking), but in hindsight these trips to Moreton, and especially the initial one, led to the cambrian explosion of discoveries for me in acrylics, inks, resins, acrylic skins, and an experimental mindset that has governed my practice.

Examples of papers made with the Oil on Water technique
Recently, on my latest jaunt in Honolulu, I was giving my own workshop to a group of teenagers, and we began with some of the same processes. Paper marbling, being around for centuries, is the act of floating pigments on water and creating organic patterns that are then imprinted on paper when placed on the surface. I was only familiar with oil paints on water, and I suspected if I want to teach more younger folk, I may need to research a less toxic method. The Japanese use the sumi ink method, and I’ve yet to try that, and I knew water-based pigments were possible, but it just didn’t square with my understanding of physics.
How do you get a water-based pigment to float on water? One solution I found on this wonderful tool called the internet, was a solution… I mean literally a solution. ;) The key ingredient to this solution is a water thickener called carrageenan. Apparently it’s a food additive and it does exactly what you think. It makes water thicker, and it is most surreal to work with this stuff. It’s water, but not quite. It’s actually a little creepy :)

Here are the acrylic on thickened water baths. This solutions bodes well for varied and colourful results, but it takes some practice to get all the solutions right. The bath itself, as well the consistency of the pigment fluids need to be just right or they’ll either disperse too much and fade, or sink to the bottom of the bath.

Some of the resulting papers from the acrylic marbling.

Here are some base layers that were used to create the latest paper pieces. They consist of different layers of watercolour paper and washi paper (semi-traslucent), and have been deconstructed and collaged.
Thanks for reading this far! I hope that means this was interesting and inspiring for you. Feel free to leave a comment, subscribe to the monthly newsletter, and/or follow me on instagram for more studio going’s-on @amandakrantzstudio. For a look at the finished products, just head over to the originals page.